Workflow
User Interface Overview
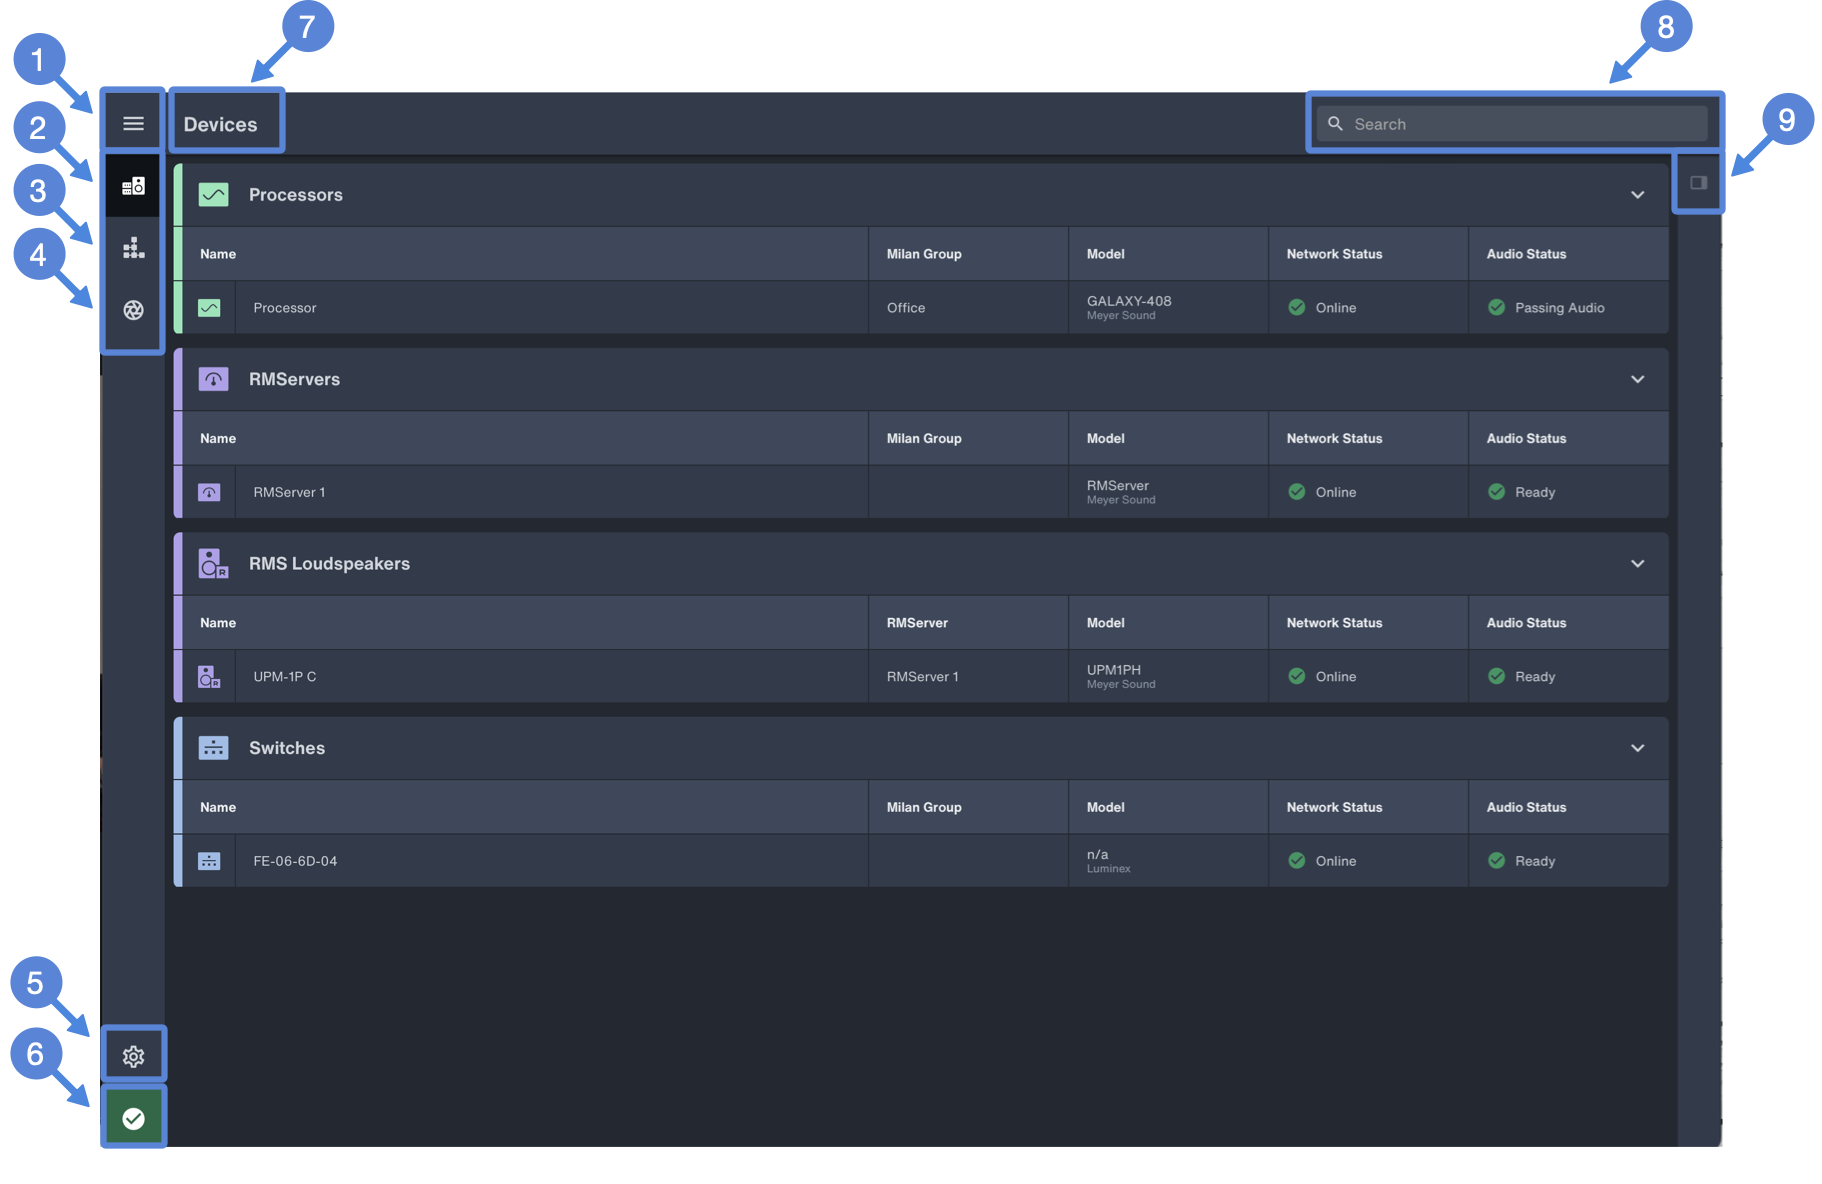
![]() Hamburger Menu: Sign Out, links to Help, Support, and View Logs
Hamburger Menu: Sign Out, links to Help, Support, and View Logs
![]() Device Manager
Device Manager
![]() Connection Manager
Connection Manager
![]() Snapshots
Snapshots
![]() Settings: Network display, Media Clock Master selection, Notifications preferences, and Display Settings options
Settings: Network display, Media Clock Master selection, Notifications preferences, and Display Settings options
![]() System Health Indicator and Event Log
System Health Indicator and Event Log
![]() Workspace Focus indicator
Workspace Focus indicator
![]() Application Search
Application Search
![]() Hide/Show Properties Sidebar
Hide/Show Properties Sidebar
Getting Started
Modify the default Device Names. Select DEVICES (1 below). Click on a device type header (Processor, Milan Loudspeakers, etc.) to expand/collapse the list of devices by type. For each listed device, double-click the name and modify the text (2 below). These names are stored in the devices and are used to correlate devices listed in software to the physical devices.
NOTE: For arrays, a good strategy is to start each name with with a number to indicate position in the array followed by a letter or combination of letters to denote the array. This aids when searching for devices and sorting columns. The number at the end of the default name is the serial number of the loudspeaker. For example:
01 Left Main Panther
02 Left Main Panther
NOTE: For network switches, the last three octets of the Milan identity name match those of the devices MAC address. If renaming, including the last three octets may be helpful. For example:
FE-A0-6B-64, renamed: FOH Primary A0-6B-64
NOTE: Duplicate Device Names within the same Group Name are not allowed.
To match devices listed in Nebra to physical devices, use the Wink function. Click once on a device in Devices (1 below) or a device in the Connections Workspace to open the Sidebar panel. Click the Wink icon (2 below) to turn on the device’s Wink LED(s). Conversely, press the Wink button on the device, which will be indicated in Nebra.
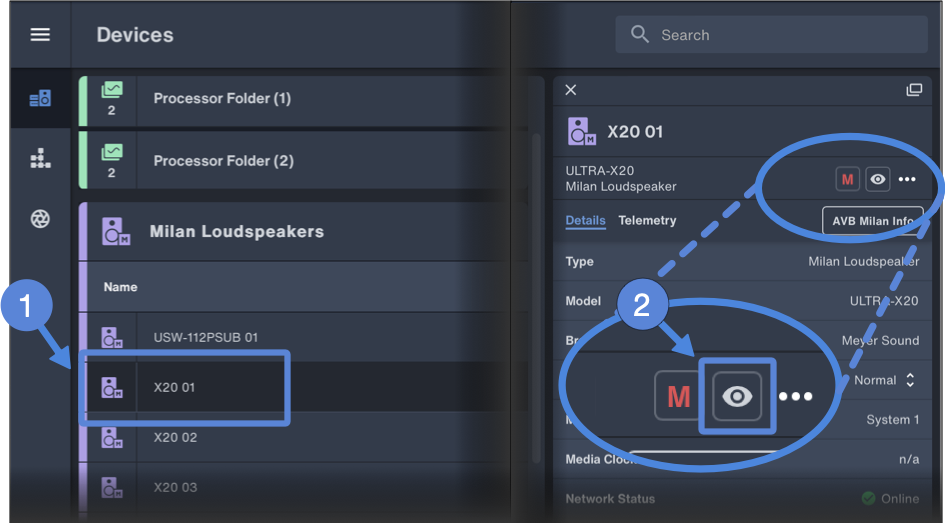
Nebra, Devices – Click Wink Icon to Turn on Device’s Wink LED
NOTE: The Wink function of PANTHER and 2100-LFC loudspeakers automatically times out after several seconds. The Wink function of other loudspeakers and devices is active until the Wink icon in Nebra is clicked or the Wink button on the device is pushed.
NOTE: To change the device name, double-click the device name at the top of the Sidebar panel.
Assign each device a Group Name. Double-click the text in the Group Name column to edit the Group Name.
NOTE: Group Names are used to organize devices (e.g., location, type, array, etc.) and are included when using the search function in Nebra.
NOTE: For Galileo GALAXY processors in Spacemap Go mode, reserve and assign a unique Group Name for these processors. Do not assign the reserved Group Name to processors not in Spacemap mode to avoid network communication issues.

Nebra, Devices – Double-Click Default Group Name, Type to Modify
Designate a device as the Master Media Clock. Click Settings (1 below), Media Clock (2 below), Set Media Clock (3 below), then select a device as the system Media Clock (4 below). Click Apply in the dialog to make the designation.
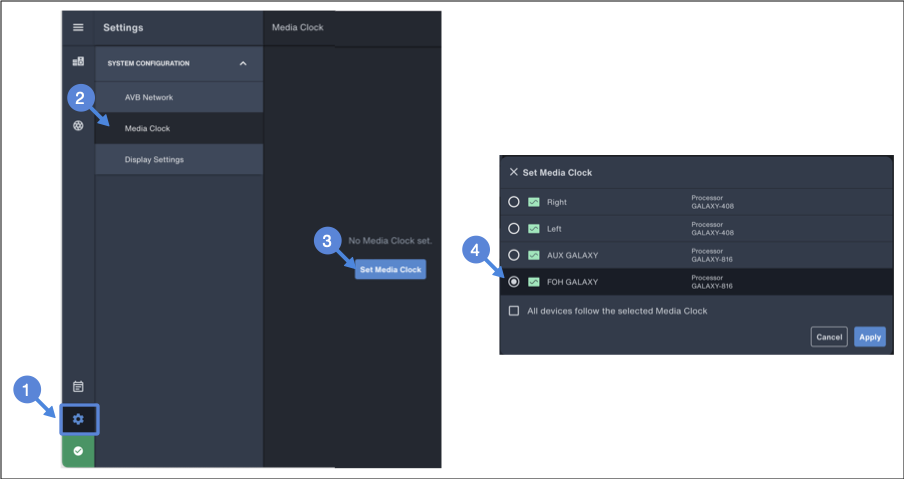
Nebra, Settings – Set Media Clock – Settings, Media Clock, Set Media Clock, Select Device
Establish Milan Connections.
Nebra, Connections – Make Milan Connection Between Talker and Listener
Steps illustrated above:
Select CONECTIONS
Click to expand Available Devices
Click-drag a Talker (Galileo GALAXY processor) to Workspace
Click-drag Lister (loudspeaker), drop on a Talker, Connection Matrix opens (method 1)
Select which Talker Output to connect to the Lister
Click BACK
Select another Listener and drag into the Workspace
Select Connect
Drag from the Talker to the Listener (method 2)
Select which Talker Output to connect to the Lister
Click Back
Select Delete
Click on a connection line to un-make the connection
Click on a device to remove the device from the Workspace
NOTE: While making connections, it is normal for the Health Status indicator to indicate device thresholds have been met while the devices are negotiating the network connection. Click the System Health icon to acknowledge. If there are no errors or faults, the indicator will indicate the status is OK.
Once a connection is made, click the connection line between devices to open the Connection Matrix and modify or de-select the routing.
Save a Snapshot. Select Snapshots (4), click + Create new in upper-right of application window. Name the Snapshot, click OK. Saves the devices and Milan connections in the Workspace for later recall.
View Device Telemetry. To view a device’s real-time telemetry data, click the device name in Devices or the device icon in the Workspace to open the Sidebar. Click the Telemetry tab to display the available details.
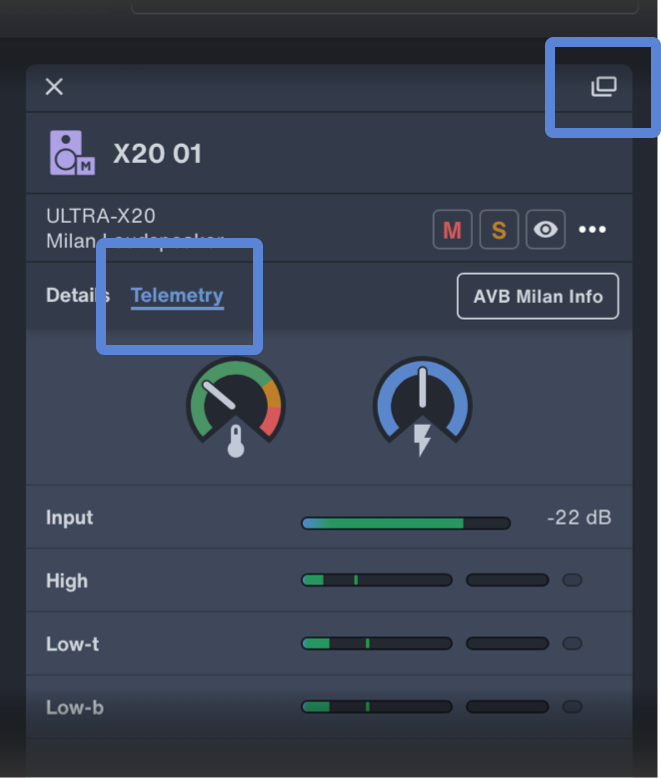
Nebra, Sidebar, Telemetry Tab – ULTRA-X20 Telemetry
NOTE: Hover the pointer on the temperature or voltage gauge to display numeric values.
Click the pop-out icon in the upper-right (highlighted above) to pop-out the Sidebar in a separate window from the Nebra application.
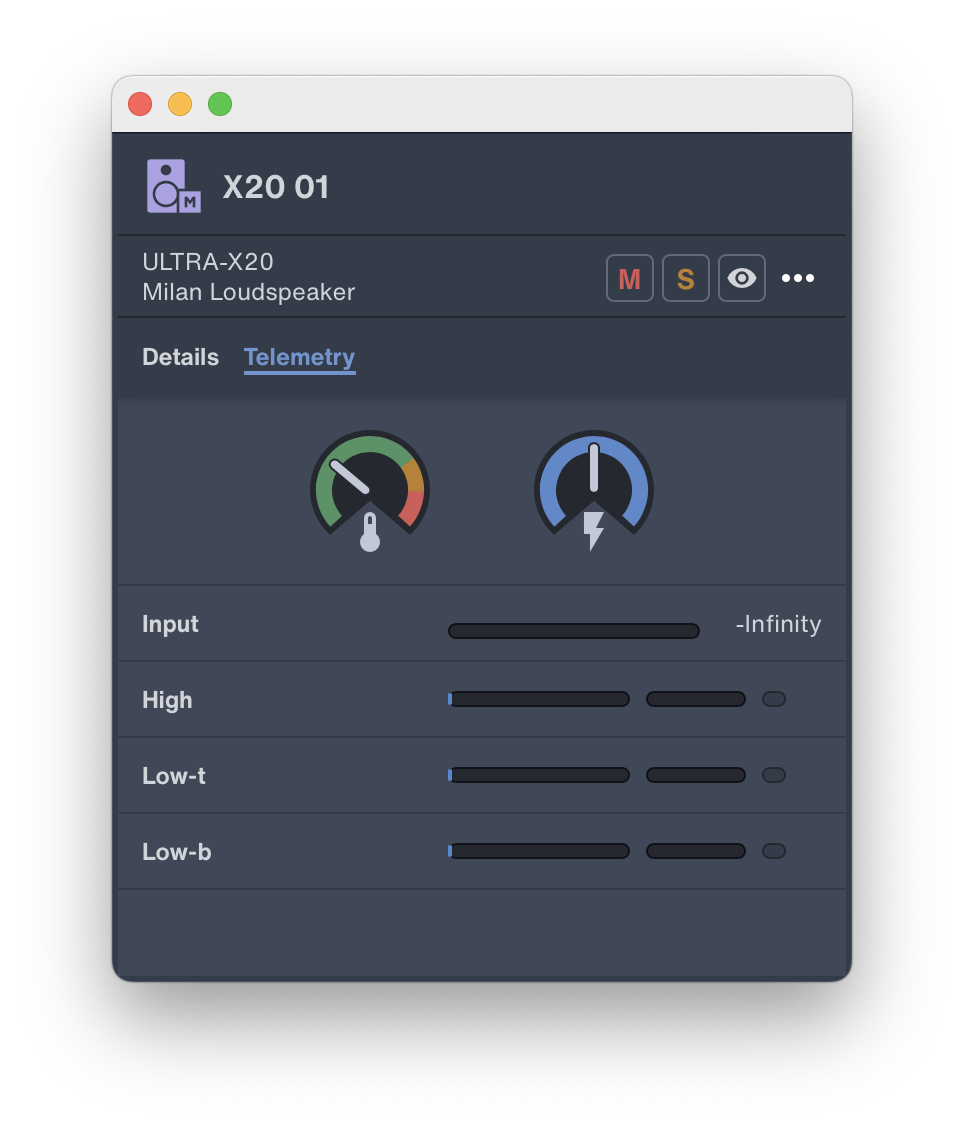
Nebra – Popped Out Standalone Sidebar Window
Download loudspeaker usage data. Loudspeakers equipped with Milan Endpoints store usage data. To download a loudspeaker log to the Nebra computer, right-click the loudspeaker name listed in Devices or right-click the loudspeaker icon in the Workspace to open the pop-up menu and select DOWNLOAD LOG FILES (left, below). The three-dot menu in the Sidebar (if open) includes this option as well (right, below).
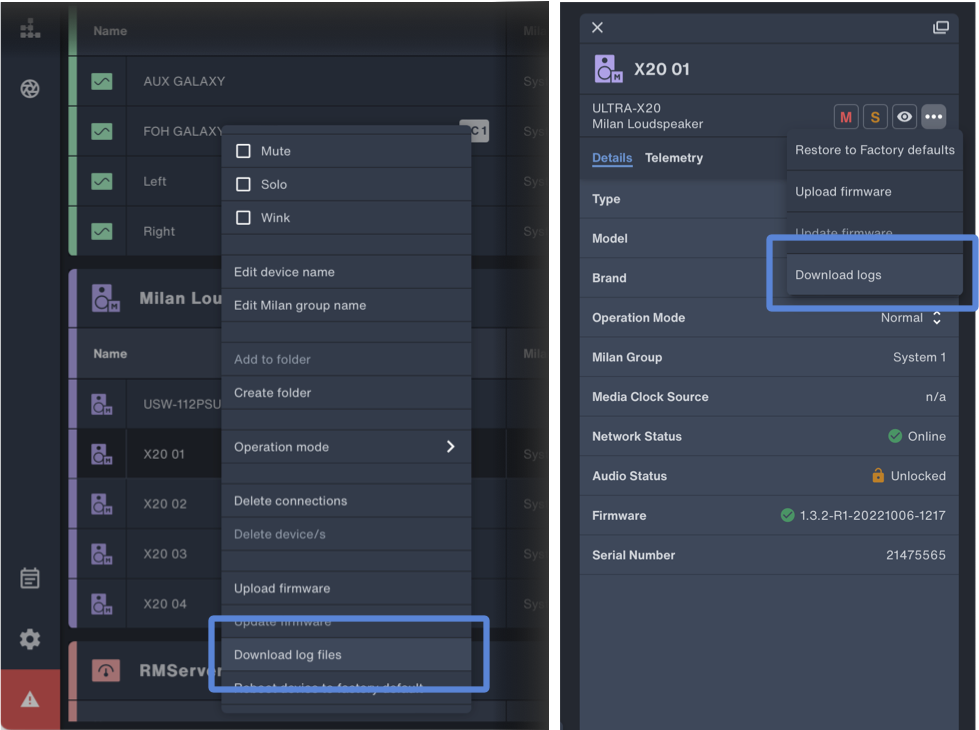
Nebra – Download Loudspeaker Log File
The .log file is listed in a Finder window that opens.
The macOS file location is: /Users/meyersound/Library/Logs/Nebra/Downloaded_Logs
The Windows file location is: C:\Users\Nebra\AppData\Roaming\Nebra\Logs
System Monitoring. The System Health indicator will turn from green to yellow (caution) or red (warning) when a device status threshold is met:
![]()
Click the Health Status icon to acknowledge a caution or warning.
NOTE: During the connection steps above, it is normal for the System Health indicator to indicate cautions and/or warnings. These are related to the momentary disconnected condition while the connection is established.
When a device status threshold is met, banners that include summary text appear at the bottom of the Workspace to alert users.
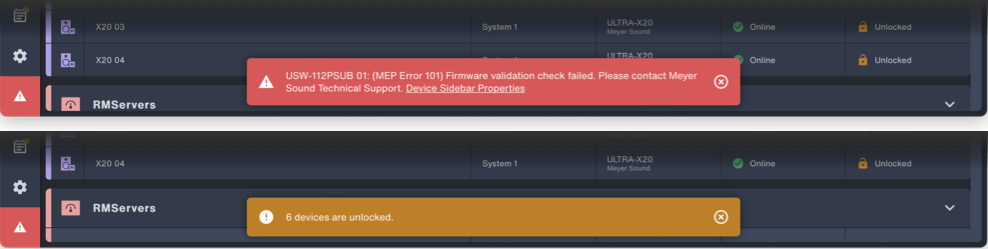
Nebra – Warning and Caution Banner Examples
Both the System Health indicator and the pop-up banners notify users that new Events have been added to the System Status Log.
Click Events (1 below) to view list of events recorded since Nebra was launched. Click the Report button (2 below) to save the System Status Report.txt file to the Nebra computer.
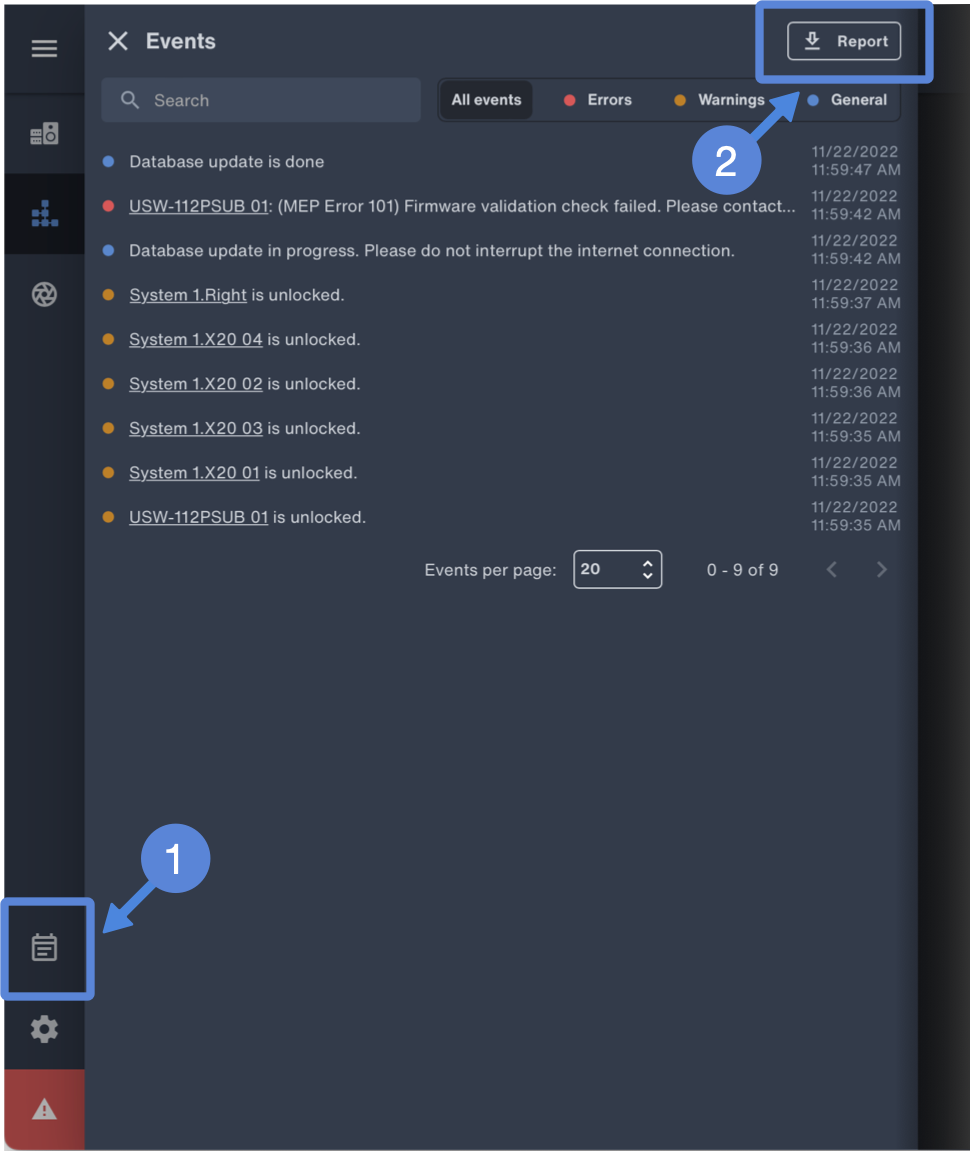
Nebra – Events Tab
The .txt file is listed in a Finder window that opens.
The macOS file location is: /Users/meyersound/Library/Logs/Nebra/SystemReports
C:\Users\Nebra\AppData\Roaming\Nebra\Logs\SystemReports
What’s Next?
Please visit Firmware Update next.